Landscapes in Relief Carving Techniques and Patterns: A Comprehensive Guide
Relief carving, an ancient art form, transforms flat surfaces into captivating three-dimensional representations. Among the most popular subjects for this technique are landscapes in relief carving techniques and patterns. From rolling hills to majestic mountains, the possibilities are endless when capturing the beauty of nature through this medium. This guide delves into the various techniques, patterns, and considerations involved in creating stunning landscapes in relief carving techniques and patterns.
Understanding Relief Carving
Relief carving involves removing portions of a material – typically wood, stone, or linoleum – to leave the desired design raised above the background. This creates a three-dimensional effect that brings the landscapes in relief carving techniques and patterns to life. There are three primary types of relief carving:
- Low Relief (Bas-Relief): The design projects only slightly from the background. This technique is ideal for subtle details and delicate shading in landscapes in relief carving techniques and patterns.
- High Relief (Haut-Relief): The design projects significantly from the background, creating a more dramatic and pronounced effect. This is often used for bolder, more prominent features in landscapes in relief carving techniques and patterns, such as mountains or trees in the foreground.
- Sunken Relief (Intaglio): The design is carved into the surface, rather than projecting outwards. This technique creates a negative image, where the landscapes in relief carving techniques and patterns appear to be recessed into the material.
Choosing the Right Material
The choice of material greatly impacts the final result of your landscapes in relief carving techniques and patterns. Each material offers unique properties and challenges.
Wood
Wood is a popular choice for relief carving due to its workability and availability. Softer woods like basswood and butternut are excellent for beginners, while hardwoods like oak and walnut offer greater durability and finer detail for more experienced carvers creating intricate landscapes in relief carving techniques and patterns.
Stone
Stone carving is a more challenging but rewarding medium. Soapstone is a relatively soft stone that is easy to carve, making it a good choice for beginners. More durable stones like limestone and marble require specialized tools and techniques, but they can produce stunning landscapes in relief carving techniques and patterns with exceptional detail and longevity.
Linoleum
Linoleum is a versatile and affordable material commonly used for printmaking and relief carving. It’s easy to cut and allows for detailed designs, making it a good option for experimenting with different landscapes in relief carving techniques and patterns before committing to a more expensive material.
Essential Tools for Relief Carving
Having the right tools is crucial for successful relief carving. Here are some essential tools:
- Carving Knives: These come in various shapes and sizes, including straight knives, curved knives, and V-tools. Each type is used for different purposes, such as outlining, shaping, and adding details to your landscapes in relief carving techniques and patterns.
- Gouges: Gouges are curved blades used for removing larger areas of material. They are essential for shaping the background and creating depth in your landscapes in relief carving techniques and patterns.
- Mallet: A mallet is used to strike the handle of the gouge, providing more force for removing material.
- Sharpening Stones: Sharp tools are essential for safe and efficient carving. Sharpening stones are used to maintain the sharpness of your carving tools.
- Pencils and Tracing Paper: These are used for transferring your design onto the carving surface for your landscapes in relief carving techniques and patterns.
- Clamps: Clamps are used to secure the material to your workbench, preventing it from moving during carving.
Designing Your Landscape Relief Carving
Before you begin carving, it’s important to plan your design carefully. Consider the following factors:
Composition
The composition of your landscapes in relief carving techniques and patterns is crucial for creating a visually appealing piece. Think about the placement of elements such as mountains, trees, rivers, and buildings. Consider using the rule of thirds to create a balanced and dynamic composition.
Perspective
Perspective is essential for creating a sense of depth in your landscapes in relief carving techniques and patterns. Use linear perspective to create the illusion of distance, with objects appearing smaller as they recede into the background. Aerial perspective can be used to create a sense of atmosphere, with distant objects appearing lighter and less detailed.
Patterns and Textures
Adding patterns and textures can bring your landscapes in relief carving techniques and patterns to life. Use different carving techniques to create different textures, such as rough bark on trees or smooth water on a lake. Consider incorporating patterns such as repeating lines or geometric shapes to add visual interest.
Relief Carving Techniques for Landscapes
Several techniques can be used to create different effects in your landscapes in relief carving techniques and patterns.
Layering
Layering involves carving different elements of the landscape at different depths. This creates a sense of depth and dimension, making the landscapes in relief carving techniques and patterns appear more realistic. For example, mountains in the background can be carved at a lower relief than trees in the foreground.
Shading
Shading can be used to create a sense of form and volume. By carving different areas at different depths, you can create highlights and shadows that define the shapes of the landscapes in relief carving techniques and patterns. For example, you can carve the sunny side of a mountain at a higher relief than the shaded side.
Stippling
Stippling involves creating a pattern of small dots to create texture and shading. This technique can be used to create the texture of foliage or the sparkle of water in your landscapes in relief carving techniques and patterns.
Contouring
Contouring involves carving lines that follow the contours of the landscape. This technique can be used to define the shapes of mountains, hills, and valleys in your landscapes in relief carving techniques and patterns.
Specific Landscape Elements and Patterns
Different landscape elements require different carving approaches. Here are some tips for carving specific features in your landscapes in relief carving techniques and patterns.
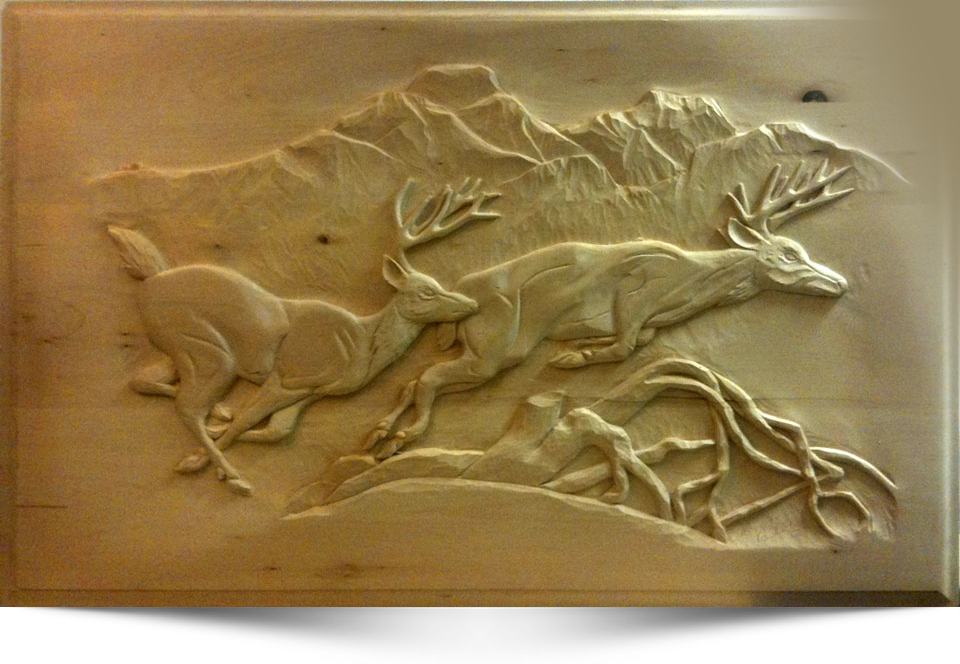
Mountains
Mountains can be carved using layering and shading to create a sense of depth and dimension. Use contouring to define the shapes of the peaks and valleys. Consider adding details such as snow-capped peaks or rocky cliffs to your landscapes in relief carving techniques and patterns.
Trees
Trees can be carved using a variety of techniques to create different textures. Use stippling to create the texture of foliage and contouring to define the shapes of the branches. Consider carving different types of trees, such as pines, oaks, and birches, to add variety to your landscapes in relief carving techniques and patterns.
Water
Water can be carved using smooth, flowing lines to create a sense of movement. Use shading to create highlights and shadows that suggest ripples and reflections. Consider adding details such as rocks, reeds, and fish to your landscapes in relief carving techniques and patterns.
Clouds
Clouds can be carved using soft, rounded shapes to create a sense of lightness and airiness. Use shading to create highlights and shadows that define the forms of the clouds. Consider adding details such as wisps of vapor or dramatic storm clouds to your landscapes in relief carving techniques and patterns.
Finishing Your Relief Carving
Once you have finished carving your landscapes in relief carving techniques and patterns, it’s important to finish it properly to protect the material and enhance its appearance.
Sanding
Sanding smooths out any rough edges and removes any imperfections from the surface of the carving. Start with a coarse grit sandpaper and gradually work your way up to a finer grit. Be careful not to sand away too much detail from your landscapes in relief carving techniques and patterns.
Sealing
Sealing protects the material from moisture and dirt. Apply a sealant such as varnish, lacquer, or oil to the surface of the carving. This will also enhance the color and grain of the material in your landscapes in relief carving techniques and patterns.
Waxing
Waxing adds a protective layer and enhances the shine of the carving. Apply a thin coat of wax to the surface of the carving and buff it with a soft cloth. This will give your landscapes in relief carving techniques and patterns a beautiful, polished finish.
Inspiration and Examples
Looking at examples of other relief carvings can provide inspiration for your own work. Visit museums, art galleries, and online resources to see a variety of landscapes in relief carving techniques and patterns. Pay attention to the different techniques, materials, and styles that are used.
Creating landscapes in relief carving techniques and patterns is a rewarding and challenging art form. By understanding the techniques, materials, and design principles involved, you can create stunning three-dimensional representations of the natural world. Experiment with different techniques and patterns to develop your own unique style. Don’t be afraid to make mistakes – they are part of the learning process. With practice and patience, you can create beautiful and lasting works of art depicting landscapes in relief carving techniques and patterns.
[See also: Wood Carving for Beginners]
[See also: Stone Carving Techniques]
